Tuesday, July 26, 2011

Vapor Barrier: Check! Subfloor: Check!

We checked two more things off the to-do list. The vapor barrier is down in the crawl space. Before and after photos follow:

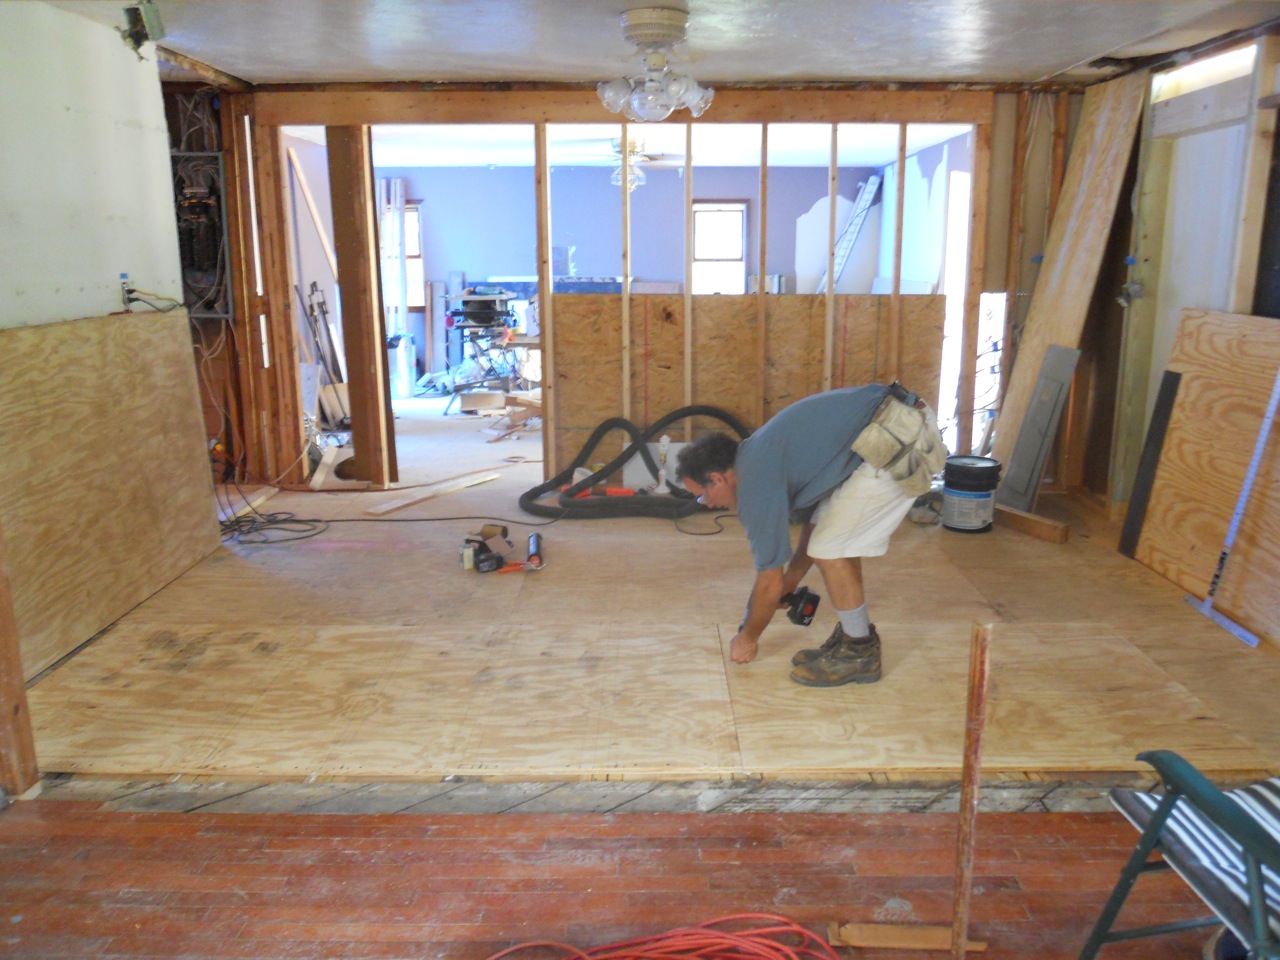
And we finished installing the joists and subfloor in the kitchen, laundry, and bathroom.
Early days: Kitchen demo in progress

Kitchen: No walls, no floor

Screwing down the last subfloor board
 The space below will eventually be divided into a laundry room and a bathroom.
New sistered joists

A floor!

Sunday, July 17, 2011

July Progress

Hot summer days are here, and we are finding out the true meaning of "sweat equity." The hot, dry weather has been good for drying out the crawl space as we prepare to put the vapor barrier down next week.

The last few days we've been getting some of the plumbing done. The drain to the septic tank is now in, and the drain pipe for the kitchen sink is poking up through the floor.
Glueing the PVC together

Making it fit

Figuring where to drill
Drain for the kitchen sink
Repair work and reframing has continued on the exterior wall. The rough door frame and sidelight are visible, and the blue tarp makes a rather atmospheric glow.
A good solid wall with door frame and sidelight openings

We took a field trip to the local metal scrap yard to get some steel tread plate that will be used for the door sills. The place was amazing and our imaginations were going wild with all the possibilities of the metal scrap.
Love the color of the rusty steel. Can you make a backsplash from it?


Cutting the tread plate with a plasma torch
We've also been doing gardening and yard work, which means contending with poison ivy and its impostors. Can you find the real poison ivy in the pictures below?
A

B

C

D
Only one of these is really poison ivy. A and C are five leaf ivy, which gets sneaky and sometimes has a few three-leaf clusters. B is box elder, and I can't say how many times I've had to pause when I come across this. It's a tree, but the young saplings look a lot like p.i. D is the real thing. 

Even though there are open floors and open walls and no plumbing, it finally feels like things are happening faster and that momentum is building. In the next few weeks, the vapor barrier will go down, floors will be put in, walls and windows will go up, and our house will take shape. Things are looking up!


Saturday, June 25, 2011

Planting

The local grocery chain was having a huge sale on plants, so we got flowers, grasses, and fruit trees at bargain prices. The weather has been perfect for planting: a mix of rain and sun.
Creeping phlox, coriopsis, day lily, guara, dianthus, bleeding heart, peony, coneflower, and a few others I can't remember the names of
Datura, cleome, bee balm, hydrangea, butterfly bush, lavender

Grasses
The wall had to come off where the bathroom was. We decided to move the floor plan around so that the doorway will take advantage of the view across the street. The bathroom will shift to the left.


Bad news bugs. I haven't confirmed via a Google search, but these look suspiciously like termites. They weren't next to the house, but about 4 feet away in some dirt and wood mulch. Hmm. Time for more research on how to get the little buggers! [Update: Good news! These are just ants!]


Sunday, June 19, 2011

Sill Plate Repairs (and Rain)

The addition section of the house was built sometime in the mid-1980s. We've come to refer to the folks who built it as the "Dingus Brothers." You can pretty much figure that they did it wrong. One of their worst ideas was putting the vapor barrier on the outside of the walls. When warm meets cold, condensation occurs. For years, moisture was running down the plastic and wetting the sill plate and the joists along the top of the foundation. Even treated lumber couldn't stand up to the constant moisture. Add a little termite damage, and the sill plates were rotten, and in places just gone, having already crumbled away.
A mess of rotten wood and squirrel poo.


What's holding up the house?
After removing all the rotten stuff, we put the "termite shields" in, new treated lumber (painted with our homemade termite discouraging paint), and lots of caulk.


Finally, we closed it up. This should last for many years.

Finished!
We got to see our regrading and drainage efforts successfully at work during the last big downpour. The water was flowing down and away from the house, and we were really happy to see water pouring out of the drainage pipe down the hill. Now we just need to add gravel, grass, and more landscaping that will channel the water and prevent erosion. Here's a little movie (sorry for the shaky-cam; I was juggling camera and umbrella).


Monday, June 6, 2011

Earthworks

More digging


18 tons of gravel
Moved it by shovel, wheel barrow, tractor...
Filled the French drains
Moving more gravel with the excavator


NW side of house with drains in place, covered, and graded. Next, we'll put a retaining wall in so that dirt doesn't collapse.

Used some of the rocks we've dug up to build a stone wall 

Back yard sculpted into terraces

 Temporary "facilities"

Tuesday, May 24, 2011

Remains of Former Occupants Found in Crawl Space!

Well, it has been about 400 million years or so since they lived here. 
Pentamerus oblongus lived during the  period when, "The Silurian sea was largely mud-free across Ohio and the climate was tropical, much like that of the present-day Bahamas."

Tuesday, May 10, 2011

Kitchen, Crawl Space, and Geology

Today was a good day -- the kitchen cabinets were delivered by Ikea! It will be a while before we can install them, but they'll be ready to go when the time is right.


Last week we rented a paint sprayer and, after vacuuming the "ceiling" of the crawl space (joists and underside of the subfloor), spray painted ceiling and walls with a mixture of "oops" paint and some additives to inhibit mold and termites (boric acid, borax, sulfur, and orange oil). This is an experimental concoction that we came up with after a lot of Internet research, so we'll see how it goes. Soon we'll be able to lay down the plastic vapor barrier on floor of the crawl space, and hopefully that will end the work down there for a while.
Here's a "before" shot. The previous owners vented their dryer into the crawl space (bad idea!) and it was really yucky.

An "after" shot of the area of the crawl space that houses the furnace and the pressure tank for the well. You can see what the ceiling of the crawl space looks like now. 
A huge improvement!

More digging today. The geology of our property is really interesting. We ran into a vein of lavender-colored clay:

and a black sandy deposit flecked with gold (mica? pyrite?). (Click on the photos to enlarge.)


You can count on hitting a huge rock about every 3 minutes when digging. We're going to have plenty of material for one heck of a rock wall!